Monday, August 10, 2015
Sunday, June 21, 2015
The big reason to avoid circle top windows or watch out for this phase of construction.
I have seen this literally a hundred times. No one puts insulation in the quarter circles. Around the rectangles they do, but not that big arched triangle. No wonder it's cold around the circletops.

This is a remodel from a late 60's build. The sheetrock was removed to show a fairly large void with a two by four block to hold it at the right thickness. No insulation at all, foam, expanding, non-expanded or otherwise. This is quite typical in every home I work in with arches and half circles.
Happy Window Research!
Saturday, June 20, 2015
Vinyl Window Frame Sizing
What about the frame thickness of new vinyl windows?
They look fat and ugly from many window manufacturers, but not all of them.
One of the things I love about North Dallas is the bow windows. There are a lot and they do look cool. More than 90% of them have not been replaced by a window contractor since the home was built and are original to the home. It's mostly because that beautiful 5 unit bow is built from five different windows. That being said, I had some fun with this one, It came out really well.
This was off of Park and Custer in North Dallas close to Plano. The custom mulls make it different than a factory built unit and that's the plan for a retro-fit window installation.
 |
| Builders Grade Aluminum Windows are certainly cheap. |
 |
| Something that works really well is preferable. |
Many folks are concerned about the thickness of the frame on vinyl windows. Although they are indeed thicker and some manufacturers, considerably thicker. Some manufacturers build very slim line type frames like the ones we see here. This is a main reason we offer so many manufacturers. It's important to have choices especially ones that help you get it right. This window manufacturer for instance doesn't build pre-fabbed bay or bow windows or french doors or skylights. Getting the right product from the right people is really important in keeping window costs down.
Here's more from my before and after page: Window Results: The Before & After Window Gallery
And the window gallery probably has a few that will help: Window Gallery - Dallas Windows

This vinyl vertical operating single hung vinyl replacement window measures two and five eights inches in frame thickness. That's about as small as it can get in a quality product. Junky ones will have a narrower frame but are so narrow they lack rigidity needed to provide longevity.


With bow windows the rigidity is less of a factor due to non expansive foam filling inside custom bent mullions. This was built from a Slim Line Vinyl Window from a local manufacturer we're very proud of: NT Window


Those are a before and after. Slim Framed Vinyl Windows after with old steel casement putty glazed window as the before shot. As you can see the frames don't get too thick if you use the right replacement windows.
Here are a few that just baffle me. All have great manufacturers but just really don't measure up. First on my list is the Jeldwen Vinyl Window. Reviews are terrible and there are a lot of reasons. I just think it's ugly. Granted that one is dirty because it was in my storage but none the less, ugly.

Next on my list of window fails is actually the Millgard Vinyl Replacement Window. While I think it may look great in a wood window opening up north, it's just not right for Dallas and North Texas. It's just ugly especially in a brick opening. I read good things, but hated the window. It uses a spring bar system which depends on vinyl strings to hold the sashes and it has sash clips to remove the bottom sash instead of tilting in. It leaves a lot of what I call "slop" in the sash. This means I can open it two inches and slide it back and forth about three quarters of an inch. It depends on weatherstipping that is on the face. I think there are much better products that are actually cheaper.

This is the Andersen Vinyl Replacement Window. The Series 200 most call it but I've seen rebranding jobs on this one. Just at a glance, exterior stops are not great, weepholes are not preferable unless needed and that shouldn't be on a single hung. It's just not what I think of as a long term product. I've found we're always better to do what's best for the home even if the wallet suffers ten or even fifteen percent to do it. This is one place cheap windows just don't pay off.

I'm sure I'll make a few revisions and additions to this post but that's just a little on frame thickness.
If you have questions send me an email! sales@dallaswindows.com
Wednesday, March 4, 2015
Vinyl Replacement Windows Plano Texas
So there are great things and not so great things about my job. I love what I do but I don't document it very well and so I loose track of great projects I've done in the past.

In this case the subject matter is home improvement projects I've done in Plano. I often get asked for references or a job the customer can drive by and look out so if all goes well the GPS on the pictures and the running Plano page will help with tracking these better. I guess we'd call it, crossing our fingers and hoping the technology holds up.
In case you wonder why I become so easy to find in Google searches for things like windows, vinyl windows, replacement windows, french doors, entry doors and so on I'd have to admit I think it has a lot to do with my YouTube video which has about 33,000 views last time I looked. I think it gets a couple of hundred views a week. Long story short, I got invited to become a Google Glass Explorer and my website has seen some pretty awesome results due to the exposure and wonderful feedback of those who do research there.
To find out more about me and what we do here are a few links:
www.DallasWindows.com This is my main website for Dallas
Here's the fun Google Glass Profile on Google Plus. This is by far my favorite social media site and it's really where you can find my best pictures and tips about vinyl window manufacturers, styles and options from out in the field where I live.

We install Simonton, NT Window, Alside, Don Young Company, Atrium Vinyl Windows, Ted Lansing Windjammers, Jeldwen Windows, Burris and Associates Windows and more. This is a place where you can see them, ask questions in the comments section and really find out what I've seen.
I'm fifty years old now and only have so much time to be the window guy. That being said, I want you to know everything that I know so you get the right thing. I'm somewhat like a house doctor with a calling. If I get good information and we make good decisions we will help the house get the perfect solution. It's a goal. We do our darnedest to make it happen.

This was NT Window Energy Master Vinyl Single Hung Vinyl Replacement Windows in Plano. Single Hungs operate from the bottom only. Single Hungs are more energy efficient than double hungs because the top sash is glued in place and therefore by design has less air infiltration. Single Hungs will also have more glass and less frame. This one has a 2 5/8" frame from edge of window to glass. Double Hungs come in at around 3 3/4" of frame with the main frame and the operating top sash frame. It can lose a lot of light and glass.

The Three Lite Casement Window in vinyl. I sell a lot of these. I like them. The end panels open like outswinging doors and have the screen on the inside. This is great in the older Plano homes with a twin window in the breakfast nook. This makes it look bigger and much prettier with a better view. This is one of the best things I bring to many homes I work on.

NT Windows Single Hung

Here's an interesting one. Our bays feature a slim line vinyl window that can produce bay and bow mulls that are just 3" wide. Most manufacturers have frames that are putting these mulls at 5 to 7 inches thick. That's a lot of plastic. If you have a bay or a bow I have the best product in Plano for a good look there. I hope you'll have a look at my Bays and Bow Windows Page.
http://dallaswindows.com/bay-window-bow-window-replacement.htm


Archtops and circle top windows are complicated. It takes several measurements to get the arch correct in a new vinyl window and it takes a good relationship and understanding of the process the window manufacturer itself uses in getting those arches to make sure the result on the house is what it's supposed to be.

This was triple glazed with Krypton Gas vinyl windows. Interestingly enough it didn't change the solar heat gain co-efficient a bit but the U Value went from .29 down to about a .18 which was quite impressive. Unfortunately that wonderful little upgrade runs about $250 a window in addition to the base model. This is what really separates the mid range window from the high end window. It's the same frame and reinforcement but the glass and the gas change. A mid range window is better bang for the buck and value. It takes a long time to get enough energy savings to cover the additional cose

Getting perfect arches and perfect caulking beads are why we are the most award winning window and door contractor in Plano and North Dallas.

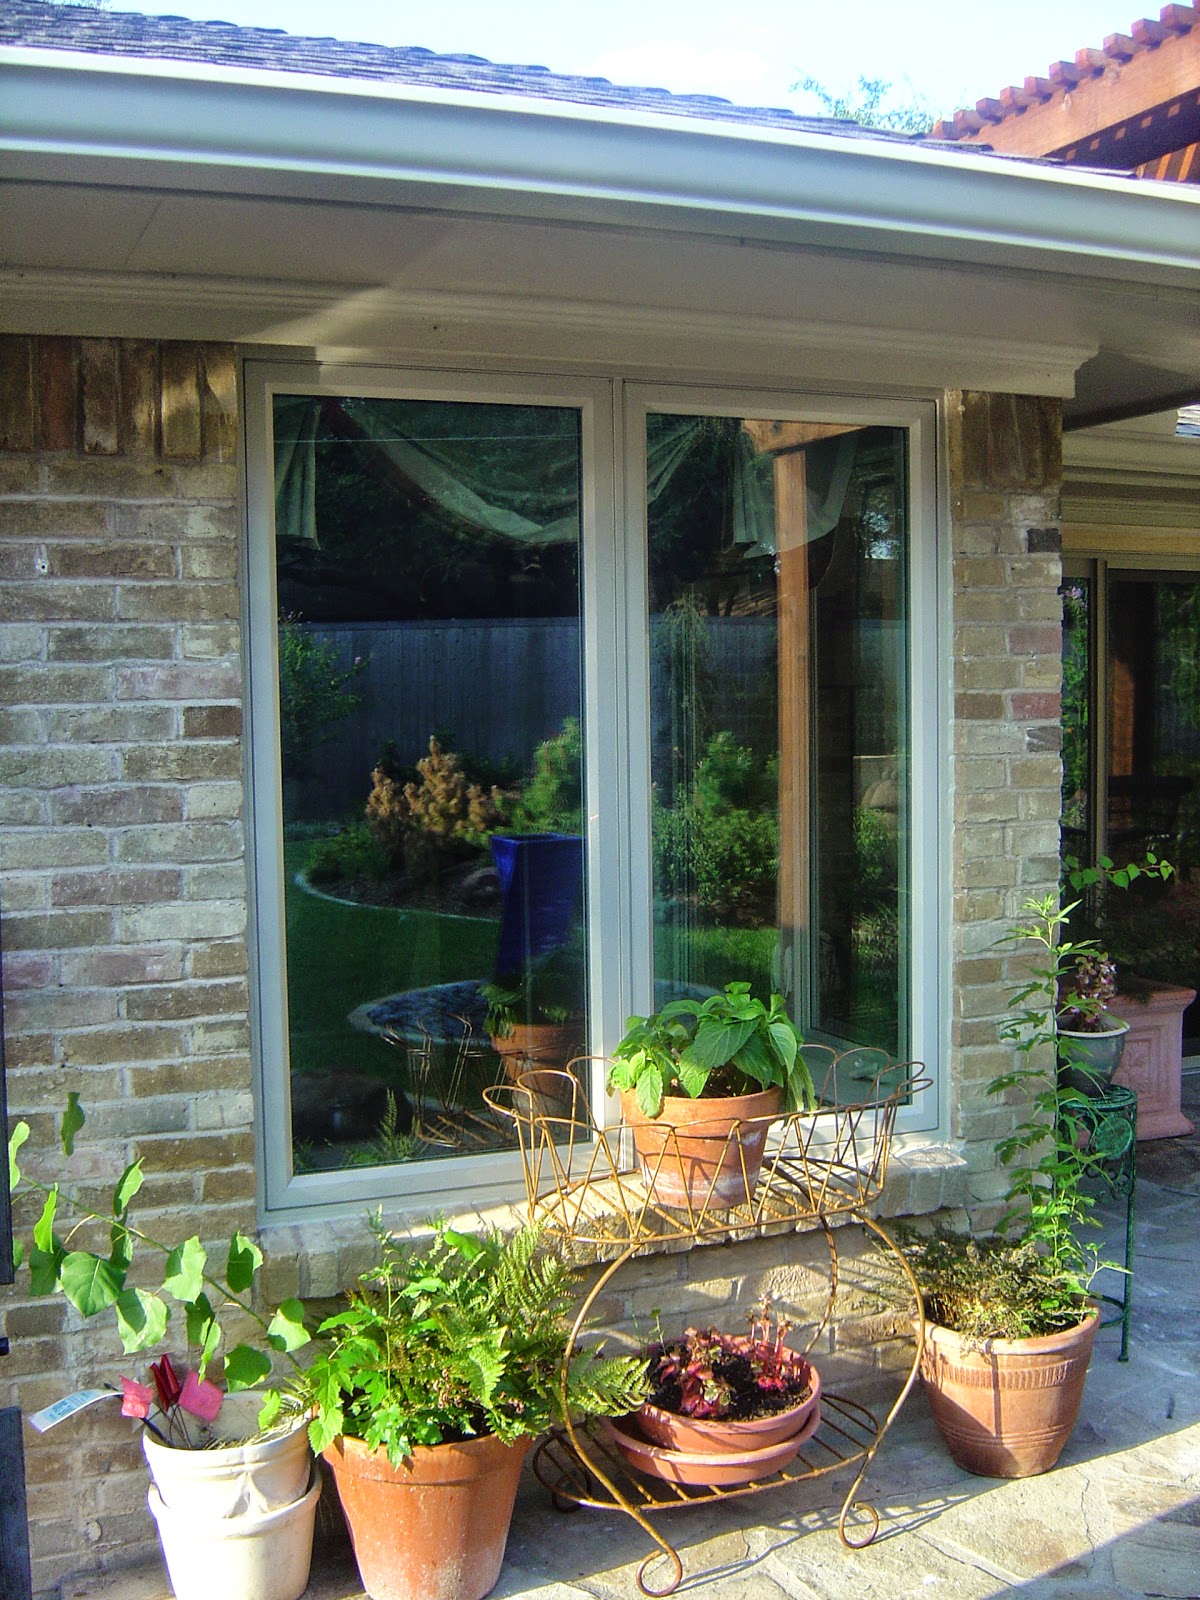
Big Picture windows! Yay!! They do have to be tempered safety glass now due to the building code so that will cost a little extra. That being said. It's worth it in many cases.

Interior view of the three lite casement in vinyl. This one came in place of a slider. The man cave never looked better! This was around Coit Road and Park as I recall.

This is the outside of the man cave one. Again, the ends swing out for air and the screens are inside the house. The look is very upscale.

On this one I squared off the archtops and went with casement windows. The mortar was still wet but the look was a huge update.

This twin vinyl casement window brings up the question to grid or not to grid. In this case it made for an awesome little cottage look. We also replaced the wood and do that whenever needed on all projects.
Here's a link to some more of my past work and commentary on vinyl replacement window projects I've done in Plano:
Thanks for looking! Send me a note if you'd like. :D
Gallery of Window Replacements in Plano from G+:
White vinyl windows with grids:
This one has a few videos on removal and caulking a vinyl window:
Tuesday, February 17, 2015
So the discussion has come up as to if casement windows and vertical operators (single hungs and double hungs) look alike.
There's no easy way to say no they don't but it's okay. That is my take on it though.
Here are some examples:
This is a double casement. Both sides swing out for ventilation. The outside has a very flat beveled look to it with what's designed to look like a putty glazed, 45 degree angle to the glass.

This is the NT Window Presidential Vinyl Replacement Window. It has a cove moulding look to the outside profile that sticks out past the face of the window frame.
This is a close up of the casement window.

Again this is a casement seen in the above shot.

This is a single hung archtop with a profile that is almost the opposite of the casement on close examination.
Monday, February 2, 2015
How to install an Exterior Pre-Hung Door.
How to Install An Exterior Door
Prehung exterior residential door installation with weatherstripping and new threshold.
Installation instructions for residential installation of a pre-hung exterior door.

We’ll be installing a pre-hung door unit. Your replacement door should be the same size, jamb thickness, and hinging of the existing door. Tools necessary are as follows: Hammer, nail set, Large Pry Bar, small pry bar, 3” flat stiff scraper, Screw Gun with Phillips head screw tip, drill with 1/8” drill bit and 3/8” paddle bit, sawzall (reciprocating saw) with 18 TPI sawzall blade, cedar shims, door casing, exterior trim (brick mold or 1X4X8’ – three pieces), small finish nails (1 ¼”) and large finish nails (2”) Three inch drywall screws or #8 Phillips head screws that are 2 ½” long . We will attempt to do this door reusing as much of the existing wood as possible for cost reasons. If you desire to re work all wood in the area. Adapt these instructions accordingly.
Prepare the new door by laying it on the ground, hinges up, and taking a few minutes to verify that its well built, square, and ready for install. Remove all shipping blocks and cardboard or shrink-wrap. Verify width of unit, height of unit, hinging of unit, jamb thickness and construction of the door itself. This is very important, as this unit must be correct before there is a large opening in the house without a door.

CHECKING THE REVEALS:
Ideally the door will have a 3/32” reveal between the slab and the doorjamb all the way around the door when the door is laid on the ground and squared corner to corner. This gap may seem tighter on the hinge side, but the real issue is that the door reveal is equal on the strike side, and that the top reveal looks straight while sealing properly at the threshold. The Threshold may be adjustable so a gap that is apparent may be adjusted up to seal. Either way we want to know that the door will have equal gaps on all reveals once its stood in the opening. If the unit is good you are ready to move forward.
- Remove existing door casing. That is the trim on the inside of the door that runs from the sheetrock wall to the old doorjamb. Begin by cutting the sealant at the wall line with a utility knife. Then cut the trim loose from the jamb. Cutting is important as we do not want to disturb the sheetrock wall or have painting concerns.
- We’ll gently slide a three-inch stiff flat knife between the casing and the doorjamb, and pry outward. Use the small pry bar and gently work the casing loose from top to bottom, moving it just an eighth inch at a time for the full length of the trim. We want to remove this casing in one piece if possible as it can be reused. All three pieces of interior casing must be removed.
- The old casing should have nails removed for reinstallation. This is done by using wire cutters and pulling the nails out from the back of the trim. This prevents nail holes from being exposed.
- Remove the door itself from the frame by either removing the hinge pins or unscrewing the hinges themselves. The Door can be removed from the work area after alarm sensor has been removed and doorknob and deadbolt have been removed.
- Our first cut will be with a sawzall and will be a horizontal cut, through the jamb of the door. It should be about 40 inches up from the bottom of the door and run the full width of the jamb itself. The jamb is probably 4 9/16” thick, but see measure tips for more information on sizing.
- Some doors will require cutting the jamb loose from the threshold by making a similar cut at the very bottom of the doorjamb. This applies to doors with attached sills. Our goal is to remove the jamb while leaving the exterior trim in place.
- Use the flat knife to separate the jamb from the exterior wood casing. Gently hammer the knife in-between the wood and the jamb and pry until you have a gap of 1/8” or so. This is a slot wide enough to get your sawzall blade into the slot to cut loose exterior nails. Make the cut. Our goal here is simply to cut the nails but some sawdust will be apparent and is normal for this step. We are cutting the jamb loose from the exterior wood. Because the jamb is being replaced it can be damaged more so than should the exterior wood. This should be left in place when possible for ease of alignment.
- This should loosen the Jamb enough to remove it completely. Insert a large pry bar between the stud of the opening and the jamb, pry as necessary to loosen jamb. Use a hammer as necessary. Be cautious not to damage the wood that is not being replaced on the exterior. Also. Watch carefully for the alarm contact wire. These are usually dropped in from the top and consist of two wires. When you cut these loose leave enough wire to re-splice the contact back together on the new door unit.
- Prepare the new door unit. Make sure all shipping wood is removed from the bottom of the door and check to see if the door is secured for shipping with nails or screws. These need to be removed. The door should be able to open, but leave it closed as you move it to the work area.
- Make sure the bottom area is clean. The sill must be free of obstructions and sealants. Ideally the sill will sit directly on the slab or foundation of the home, or, on top of the wood sill. Also, clean out the opening. Insulation, nails that are protruding, and sealants should be scraped off and removed to provide a clean opening.
- We’re ready to set the door at this point. Gently place the door in the opening. Be careful that you are not finding any obstructions.
- The door will be mounted with six 3” long fully threaded sheet metal screws run horizontally through the vertical jambs (three on each side). A 3/8” paddle bit is used to drill the mounting holes. Mounting holes should be 1 ½” from the corners of the jamb directly in the center of the exterior part of the jamb. They are on the vertical sections of the jamb itself. They are 3/8” deep. The function of the holes is simply to make sure the screw heads seat below the surface of the jamb.
Quick Tip 1
In all instances screws will run better, straighter and more accurately in general if predrilled. Every time you see a reference to installing a screw, it is preferable to pre-drill a hole, using a drill bit somewhat smaller than the diameter of the screw itself. An 1/8” or 9/64” drill bit works quite nicely to run pilot holes for # 8 or # 10 screws. The screws in a doorknobs backset or strike plate would require a smaller pilot hole (7/64” or 1/16”). Although not mentioned specifically at each step, we always recommend pre-drilling. It makes the screws install easier, and makes them easier to remove if necessary for adjustment or re-alignment.
Quick Tip 2
If a screw begins to strip out, that is, the tip of the screw gun slides off of the screw, remove the screw and discard it. A screw that is stripped is a major hindrance to our install and will not make our project go smoothly. The screws are relatively inexpensive but lost time due to a stripped screw that must be removed is always costly (in time if nothing else).
- Center the door in the opening at the bottom. Use the interior paint line or the existing base trim as your gauge. You will also need to be sure that the new jamb is flush with the sheetrock on the inside. Any gaps that are created will be sealed and filled with caulking so variations that are minor are dealt with at that stage. Interior casing is 2 ¼” thick so our door should mount in a way to accommodate this trim again. Mount bottom screws. It is often necessary for someone to hold the door up and in place in order to perform the mounting process.
- Center the door at the top between the paint lines and install the mounting screws on top. The door may not work properly at this stage so be careful to examine the reveals and the square-ness of the unit before opening it or closing it.
- With the 4 screws mounted you should stand back and examine the square-ness of the unit. Also, verify that we are lined up with the vertical paint lines on the interior of the home. These lines are crucial. Hold the casing up to the door and make sure it covers all the old paint lines on the sides. If all these line up properly then move forward.
Top Reveal
- When the door is closed, examine the top reveal to see if it appears straight with the door slab. One side or the other may need to come up. It is important to move the side jamb vertically to correct this reveal issue. A drywall screw run up through the top jamb (center the screw on the outside part of the top jamb, at 1 ½” from the corner of the door). This will secure the door while you remove the other two mounting screws. Utilize shims under the door, and the sheetrock screw to move the jamb up as necessary to correct the reveal problem. Making the top line appear straight with the door slab is very important.
Vertical Reveal (Twisting of opening)
- The next reveal to check involves how the door lines up vertically with the jamb itself. Open the door and hold it slightly open and examine if the door and the jambs line up. A good point of reference is the weather-stripping. The Door must hit the weather-strip from top to bottom at the same pressure. This reveal addresses that issue. This is described as “zero to eighth inch” or “zero to quarter inch”. These descriptive phrases describe the twisting of the opening. Twisted openings are common in today’s homes. This is the main reason doors should be hung according to what is aesthetically pleasing and functional not what is plumb, or level.
- The jamb must line up with the door slab as it closes. “Floating” the jamb in and out as necessary to fix this reveal does this. We are looking for a “zero to zero” reveal (that is. straight up and down as we look at the door and its relationship to the jamb. If it’s a major discrepancy you may need to float more than one corner. Remove the mounting screw and push the jamb towards the inside of the home to fix the problem. Try to make this adjustment be not more than 1/8” per corner. In practice, one-eighth inch on 4 corners will allow for one half inch of twisting in an opening. This twisting must be addressed before moving to the next step.
- At this point we want to recheck all reveals.
Verify Side Reveals
- Sometimes a hinge screw is necessary through the top hinge to pull the door up and correct sagging issues (evident by unequal lines from top to bottom between the door slab and the jamb itself on the strike side). Find a happy medium between steps 16 and 20. The hinge screw will increase the reveal between the slab and the strike side of the jamb, while moving the doorknob side of the slab “up”. This will change the top reveal mentioned in step 16. Looking for a consistent gap between the door slab and the jambs is very important to correct operation of the door unit. Hinge screws may also be utilized in other hinges as necessary to move the door within the frame. Remember not to over tighten screws. Shanked screws will pull harder than fully threaded screws. Fully threaded screws can actually be used to hold a piece of wood out and away from another piece of wood. This may be helpful to know when picking the correct fastener for the job.
- Once we’re happy with all reveals (top, sides, and weather-strip reveal), we are ready to install the last two mounting screws through the side jambs. These are in the middle of the vertical jambs of the door (centered in the exposed exterior of the jamb). Hold the jamb in place to assure the reveal is correct at the sides (to assure the knob works properly). Also make sure that you don’t see any bowing in the hinge side of the jamb. If bowing is evident install shims as necessary to make the hinge side jamb appear straight and without bows.
- Use shims to firm up the mounting areas of the door in a minimum of three places on each side of the door. Put the shims in tightly and make sure that they are secured in place by the mounting screws. They can be lightly tacked with a small finish nail if necessary, but the overall tightness of the shim against the jamb and the stud should hold it in place. The screws should be tightly run and the door should feel stout when pulled up or down. The shims will need to be cut back to flush with the walls. This is done using the utility knife, and gently cutting through the shim at a slight angle. Make the cut towards the door not away from the door. If the knife gets away from you it is easier to cover an error on the door (which will need to be painted) as opposed to wall damage. Ultimately our goal is to not have to paint or do patch work on the wall itself. The door, trim and jambs will need to be painted after the install.
- Door Knob and deadbolt are installed at this point. The strike plates will need to be mortised into the side jambs. Mount the strike plate for the doorknob first using two screws and verify that the door latches and operates properly. Many doors are pre-mortised for the entry knob strike plate. If it is not mortised, it should be at least drilled with a 1” hole for reference. Mount the plate; verify that the plate is positioned correctly by closing the door and checking operation of the door. Check operation of the deadbolt. Adjust the plate as necessary to make sure the door latches, locks, seals, and that the deadbolt will throw correctly. If necessary, mortise the strike plate in the following manner. Use a utility knife to cut carefully around the plate and remove the screws and plate from the jamb. Using a sharp wood chisel, tap lightly on the end of the chisel to cut a line where the wood must be removed (i.e. the utility knife cut line). Then use the chisel to remove one sixteenth of an inch of wood from the surface of the jamb where the strike plate will be installed. This is a very important step cosmetically. Make sure not to damage the wood that is not covered by the strike plate. Reinstall the plate and verify that the door latches and locks properly. This step may need to be repeated for the deadbolt strike plate.
- If it is necessary to drill for the deadbolt hole as well as mortise, make sure the knob strike plate is positioned well for door operation. Open the door and throw the deadbolt out fully. Use lipstick, model paint, or touchup paint to paint the end of the deadbolt’s throw mechanism. Return the deadbolt to the unlocked position and close the door firmly as you expect it to close under normal conditions. Turn the deadbolt to lock it and allow the end of the deadbolt to mark the jamb for your throw hole. This hole is drilled using a 1” paddle bit.
- Shims may be necessary under the threshold in order to reduce movement. Shim evenly in no fewer than 5 places along the threshold area. Remember to use the shims as male and female pieces (that is, one runs in from the inside and one runs in from the outside) as this keeps them flat as opposed to angled. The threshold must not move when stepped on. The shims will prevent it from sagging, but three to five careful placed screws may be necessary to secure the threshold. Measure for these if they are exposed to assure aesthetics. They should be in the center of the threshold, one in the center, two on the ends at 1 ½” from the edge of the threshold, and (if necessary) two others to be centered between the end screws and the center screw. A 2 ½” #8 or #10 sheet metal screw will work quite well here.
- Doors with adjustable thresholds can often have the threshold mounting screws underneath the adjustable threshold. This is done by removing the adjustable threshold and running the three to five screws in the area that is covered by the adjustable threshold. Care should be taken to place these screws in a place that does not hinder the adjustability of the threshold. Verify that the door threshold is solid and can be walked on by persons of all weights. Anything “spongy” is not acceptable. Sometimes thresholds will need to be mounted using anchors and screws, in holes that are drilled using a masonry bit. This is often done utilizing a hammer drill when drilling into a homes foundation. An easy way to do this is to drill a 3/16” hole through the threshold into the ground.
- Your door should be mounted and operating correctly at this stage. If not, make sure to back as necessary to correct the problem. If all is working and looking well, you can insulate. Fiberglass insulation is best. Soft spray-in foam is also acceptable but “Great Stuff” is not. Many manufacturers will void your warrantee if you use a spray in a foam product that doesn’t remain soft. Many spray in foam insulators expand greatly and dry very rigidly. This is not good for doors as it can bow jambs and cause the door to be tighter than the manufacturer designed it to be. Lightly packed fiberglass insulation such as an R-14 Owens-Corning Fiberglass insulation is ideal.
- At this point, we are ready for interior casing. Cut the new casing in a manner that will cover all old paint lines, cutting the top first. It will be cut in a manner similar to the one removed (i.e. 45 degree angles on each end). If reusing old casing, a cut is usually unnecessary. The top piece being first, center and nail it carefully using 5 nails equally spaced and nailed through the casing and into the door jamb itself. Do not nail to the wall at this time. The casing will sit about three-eights of an inch up from the edge of the doorjamb. Verify that this will cover the sheetrock up to the old paint line on top. Also, verify that the corners of the casing will work out on the sides as to covering the old paint line. A 36” prehung door will usually have casing that is 36 ¾” inside corner to inside corner. Using 2 ¼” casing, that casing will measure 41 ¼” outside corner to outside corner. This is “generally” accurate but should be verified on-site. Nails used should be 1 ¼” long finish nails. Do not run them closer than 5/16” from the edge of the casing as it could split.

Quick Tip 3
The next few steps are your last chance to make small adjustments on your interior jamb reveals. If they are not perfect you can use your 3” flat knife to gently pry between the door slab and the jamb and move the wood around slightly before you nail. Several places mention not nailing to the wall itself. This is to make sure you have this adjustability for last minute adjustments. Once the trim is on our reveals cannot be moved so we need to be sure the door is operating well and the lines look straight overall before we run every nail. If you aren’t happy with the top reveal, after the trim is nailed to the top of the doorjamb, gently pry the jamb up on the lower end until it is straight and nail into the wall using a 2” or 2 ½” finish nail. This allows the wood trim itself to help you straighten out slightly misaligned reveals.
- Measure the height of the sidepieces from the slab to the top corners of the mounted top piece of casing. Cut these pieces. Set them in place and verify that they will work and not be interfered with by the base trim at the bottom of the wall. Sometimes it will be necessary to remove the base and cut it back in order to accommodate the new casing. If removal of the base is difficult, it can also be cut back by setting the casing in place over the existing base and scribing a straight line with a utility knife into the surface of the base molding.
- Either make the cut with the knife or utilize a sharp wood chisel and a hammer. When using the chisel, you will place it on the scribed line and gently tap it with the hammer. As you get into the surface of the wood you can shave the wood up to the cut from the end of the base. This slowly shaves material away and allows clearance to make the next scribes with the chisel. This step may need to be repeated several times in order to completely remove the unwanted section of base. Be careful that the sheetrock is not being damaged as you perform this step.
- When mounting the casing start at the top to make sure the miter is attractive and work your way down the sides. Place a nail at 3 to 4 inches from the end of the casing, through the casing and into the doorjamb. There should be six to eight nails used on each sidepiece of casing. The side piece is about 83 ½” long, the nails are to be placed about 8 to 10 inches apart and no closer to the end than three inches (this prevents splitting). Be sure to run the nails straight into the jamb so as not to accidentally have the nail come through the jamb and impede the operation of the door. The nail should be no closer to the edge of the casing than 3/16”. Be aware of the edge of the jamb as you run your nails, some degree of angle may be helpful in attaching the casing, but be sure the nail is running into the jamb and not splitting out through an exposed area. Be sure to hold the reveal between the jamb edge and the casing edge straight and consistent from top to bottom as you nail. Once again, nail to the doorjamb and not the wall. Once the trim is secured to the jamb you can make minor adjustments to interior reveals on the side by using the same method used on the top reveal. Gently pushing the trim and the jamb toward the door or using the flat knife to gently pry the jamb away from the door is a great way to fine-tune all your reveals. Use the larger nail to mount the casing to the wall once your jambs and trim are in the perfect place aesthetically.
- Carefully run a nail into each corner miter. Use shims if necessary behind the casing to make sure the miters look perfect. If a nail was utilized to correct a reveal problem, it may be necessary to put the flat knife between the trim and the wall and move it outwards to make the miter look appropriate. This will not affect the reveals to any great degree if done gently and carefully. A gap between the wall and the jamb is not a problem, as this edge must be sealed with caulking as our final pre-painting step. Some variation between the wall and the trim is inevitable as home are not perfect and do move around after being built. They also can move somewhat seasonally and due to dryness or excessive wetness around the foundation.
- The bottom of the door may require an interior piece of trim. Usually, three quarter inch quarter round works quite nicely. Cut it to fit between the two pieces of casing and install it using small finish nails through the trim and into the door threshold itself. Gluing the trim is necessary in some cases if the door has an aluminum threshold. You can sometimes nail directly into the shims that support the threshold. Tile floors are best re-grouted when a gap is evident, but the wood trim is an excellent option if grout is unavailable or inappropriate.
- Use the longer finish nails to secure the outside trim that was left in place to the doorjambs. Five to Seven nails per side and three on the top is quite sufficient. Nail carefully so as not to allow nails to break through to the exposed areas of the doorjamb. Small nails to attach the corner miters run from the side into the meat of the wood will help to hold the miters properly. Sometimes the casing will not be directly against the sheetrock in order to make the door line up properly.
- The door is essentially finished at this point aside from putty in the nails holes, and caulking on the edges. Interior caulking is primarily cosmetic but the exterior is very important. Use a paintable caulking. Use a clear caulking on the bottom so as not to make a mess. Clear Silicones are most appropriate on the bottom as they are the most durable. Acrylic Latex’s with silicone are fine for the areas that need caulking where both edges to be caulked are paintable.
- Allow your sealants to dry for 24 hours and you’re ready to paint. Check with a paint professional to get the best paint for your area and your budget. Paint all wood surfaces, trims, and the door slab itself. Do not paint weather-stripping, hinges, thresholds, bottom trim on the door slab, or strike plates.
Enjoy your new door……It’s a professional installation……aren't you proud?
Saturday, December 27, 2014
Getting a Model Home Discount on your home improvements.
The Model Home Discount in Home Improvements
Lot's of people like to do their research on the internet. That's a given. Most of my customers find me while looking me up on Google. My site is on page one of most of the relevant search terms I like to have.
Dallas Windows, Vinyl Windows Dallas, Replacement Windows Dallas and various other phrases including Wood or Aluminum. Long story short, I have pretty low overhead. No shop. Just a service that I provide. Installation of residential replacement windows and pre-hung doors with an occasional patio door here and there.
I worked for a big multi-million dollar window and door company that sold replacement windows for a thousand dollars a piece in the 90's. In many ways they were worth it. Today it's not the best choice but for millions of homeowners it was.
The reason I am revisiting my window installation past at this juncture is that I just read a post from a notable site with reviews and such on it that I sorta disagree with.
This is an opportunity to see a real simple contrast in overviews from two different seasoned window guys.
I have a friend in Richmond Virginia. A new friend but not a competitor. Very down to earth. You can tell in his writings. He put up a post on the Model Home Sales Pitch you sometimes hear about. As he so aptly points out. It was hilarious in Tin Men with Danny DeVito.
The premise is that a contractor or company comes to you with a deal for being a model home.
His post is here and you can give it a look :
http://thewindowdog.com/model-home-windows-program-window-scams/
Now here's why I think it's sorta cynical. If a contractor has nothing going for himself, his products and craftsmanship besides a "model home discount" of course you should never do business with them. Thats just good common sense.
That said, I'll sometimes bid a job a bit lower to get my foot into a good neighborhood. I know my work is beautiful and neighbors who see it will be tempted to want some. I don't see that as unreasonable or as he seems to implicate "a scam". Bottom line is that you should get a few estimates and always look for someone you can trust with your money, your home and your project, because they will end up being responsible for all three.
Often that's not a cheap guy. I don't even try to be the cheap guy. That leads to the budget being too tight and product or quality of labor diminish. The trade off isn't worth it.
No one needs the cheapest car at the Carmax. Most of us need something dependable in the middle of the cost spectrum. None of us expect a good car for a thousand bucks. None of us like spending Thirty to Fifty Grand on one either. There are reasonable choices in the middle of the two extremes.
Back to the model home discount. If that's the only thing they have to offer you to win your business you should probably keep looking. If someone offers you something like that it's probably not a scam, but it is certainly a gimmick.
Monday, March 3, 2014
Alside Mezzo Vinyl Replacement Windows
Alside Mezzo Replacement Windows will be our first new window line released in 2014.

This should be one of the best updates to come out in years. It will have a narrow frame for more glass and the option of custom exterior colors.
Many of these aren't able to boast of a narrow profile frame and still be a lifetime warranty, energy star approved replacement window.
I scanned the first brochure I got in. This product was released on 2-15-2014 to replace the Excalibur Series.Alside was the Energy Star Partner of the Year 2000, 2001 and 2002.
They've been Better Homes a Gardens Best Buy and produced several proven lines over it's history. We use their casement windows, Ultra-Max vinyl replacement windows and were pleased with the quality and durability of their product.
The upgrades on this window are:Interior trim groove for factory trim as needed.New Exterior Color choices beyond the typical white and beige to include the following:Architectural Bronze, English Red, Desert Clay, Hudson Khaki, Forrest Green, American Terra, Castle Grey and of course, Beige and White.
Optional interior upgrades include
White wood grain, Soft Maple wood grain, Rich Maple wood grain, Light Oak wood grain, Dark Oak Wood grain, Foxwood wood grain, Cherry Wood grain and again beige or white interiors as extruded.
Solid white or beige are always less costly, This product is Energy Star Rated and Approved in all climates.
Composite horizontal reinforcement bars instead of steel to be less conductive of heat and cold.It has the factory preferred 3 1/4" jamb thickness while keeping the profile under 2 3/4" of frame in the single hung model. This is a great new option for us in Texas and will be a great new addition to our available lines.
Here's the link to the full scan of our first brochure on our Google Plus Page!
Wednesday, January 22, 2014
Fogged Up Windows on the Real Estate Inspection
A call that I field a great deal comes from the home seller and has to do with fogged up windows on the inspection report. This creates a few options for the seller that should be balanced and it also is a good read for a home buyer as the options effect your new home and it's longevity.

For the sake of discussion we have a 2400 square foot house that is listed at $265,000 here in Dallas Texas. Most homes built from the 80's forward have had builders grade aluminum double paned windows. They often came with a 5 to 10 year seal failure warranty but they seldom have anything more than this. The end of our warranty hopes just came upon us.
This home would have on average 18 to 24 windows and probably about 8 to 10 panes of glass that might be showing condensation between the panes or white calcium build up between the panes.
The home inspector will not be able to see all the windows with seal failure as many times the actual tell tale signs are years away for some of the windows. Back to the example home. Twenty four windows will have 40 or so lites of glass and if 8 get flagged (tagged, dotted, whatever the inspector did to them) that's probably a win as there are 8 more just about to go out.
Cost to replace fogged windows. On average the small ones are $125.00 and the big ones above them are $175.00. Big circle tops and arch-top shaped glass replacement is considerably more and can be $600 to $1000 depending on the size. This means the big beautiful one in the foyer.

As this problem is usually noted at the time of sale, here's another option. If 8 flagged units can be settled with the new buyer at $800 to $1000. That's always a win for the seller. No scheduling, no issues.
For the buyer that can be a win too. A thousand towards a better solution than glass replacement might be a good thing. You can both haggle over the other $500 in labor and variables that could come into play.
Glass replacement will fix the clarity of the glass but not the energy efficiency of the window. Most 80's to 90's era homes have that builders grade frame and installation that just won't seal well after a period of time. New glass in a builders grade window is much like new tires on your 1972 Pinto. You'll be stuck to the road better, but you're still driving a 1972 Pinto.
A long term solution is a good vinyl replacement window with a lifetime warranty that can offer better U Value and Solar Heat Gain Coefficient. The builders grade clear insulated window allows 87% of the heat through the glass whereas a quality replacement window will only allow about 21% of the heat to pass through it. That's furnace heat staying in and sunlight heat staying out, all year long!
Now I admit that I am partial to replacement windows as I've had a lifelong career in Dallas and surrounding areas as a window guy, but the reality of how happy folks are when their house is suddenly airtight is so very motivating to me. It makes me want the job to be perfect so the results are notable. Enough about me though this is about foggy windows isn't it?
So now you know the options. Google Glass Replacement if glass only is what the inspector came up with. I also recommend you enter the zip code and look for a glass shop closest to your home. That is the guy who can do it cheapest in most cases. If you're a house flipper replacement windows may be a better option to put a fresh face on the property. In your case you'd search for Replacement Windows or Vinyl Windows. If you're in Dallas and surrounding areas I hope you'll let us weigh in on your project as well. ~ Dave Traynor
For the sake of discussion we have a 2400 square foot house that is listed at $265,000 here in Dallas Texas. Most homes built from the 80's forward have had builders grade aluminum double paned windows. They often came with a 5 to 10 year seal failure warranty but they seldom have anything more than this. The end of our warranty hopes just came upon us.
This home would have on average 18 to 24 windows and probably about 8 to 10 panes of glass that might be showing condensation between the panes or white calcium build up between the panes.
The home inspector will not be able to see all the windows with seal failure as many times the actual tell tale signs are years away for some of the windows. Back to the example home. Twenty four windows will have 40 or so lites of glass and if 8 get flagged (tagged, dotted, whatever the inspector did to them) that's probably a win as there are 8 more just about to go out.
Cost to replace fogged windows. On average the small ones are $125.00 and the big ones above them are $175.00. Big circle tops and arch-top shaped glass replacement is considerably more and can be $600 to $1000 depending on the size. This means the big beautiful one in the foyer.
As this problem is usually noted at the time of sale, here's another option. If 8 flagged units can be settled with the new buyer at $800 to $1000. That's always a win for the seller. No scheduling, no issues.
For the buyer that can be a win too. A thousand towards a better solution than glass replacement might be a good thing. You can both haggle over the other $500 in labor and variables that could come into play.
Glass replacement will fix the clarity of the glass but not the energy efficiency of the window. Most 80's to 90's era homes have that builders grade frame and installation that just won't seal well after a period of time. New glass in a builders grade window is much like new tires on your 1972 Pinto. You'll be stuck to the road better, but you're still driving a 1972 Pinto.
A long term solution is a good vinyl replacement window with a lifetime warranty that can offer better U Value and Solar Heat Gain Coefficient. The builders grade clear insulated window allows 87% of the heat through the glass whereas a quality replacement window will only allow about 21% of the heat to pass through it. That's furnace heat staying in and sunlight heat staying out, all year long!
Now I admit that I am partial to replacement windows as I've had a lifelong career in Dallas and surrounding areas as a window guy, but the reality of how happy folks are when their house is suddenly airtight is so very motivating to me. It makes me want the job to be perfect so the results are notable. Enough about me though this is about foggy windows isn't it?
So now you know the options. Google Glass Replacement if glass only is what the inspector came up with. I also recommend you enter the zip code and look for a glass shop closest to your home. That is the guy who can do it cheapest in most cases. If you're a house flipper replacement windows may be a better option to put a fresh face on the property. In your case you'd search for Replacement Windows or Vinyl Windows. If you're in Dallas and surrounding areas I hope you'll let us weigh in on your project as well. ~ Dave Traynor
Wednesday, January 8, 2014
A New Blog for a New Year!
A New Blog for a New Year
By Dave Traynor
Well the SEO world says that it's not enough to have a Facebook Page, and a Twitter Profile, and a Google Maps Listing, or a Google Places listing. Now the thing to have is a blog. I personally even hate the word much less the concept.
What's a blog? It sounds like a contraption created by a bad log. It's not an article. Not a webpage. It just sounds useless already. So much for optimism in the New Year.
No really I do have good things to say and add to society I just haven't figured them out yet. Well that's not true either, I do know what to say. Say something nice or don't say anything at all. Thanks Grandma.
I have a great list of 13 things mentally strong people don't do. I can't remember where I put them. Google Plus profile I think.
Google Plus! That's what it was I needed to blog about! The single most important thing for a New Year and a small business is not really a blog in most cases. It's a Google Plus Business Page.
A G+ profile for yourself will work much like a facebook page but more importantly, serves as a base author for your business profile, which over time will become the "publisher" of your website. This Publisher and Authorship association with your web page will serve to bring higher organic web rankings to your website.
You can't underestimate the importance of getting in early. For my company DallasWindows.com the two words Dallas and Windows are important. How awesome was it to get my Google Plus Business Page up and acknowledged with a new cool page id like this one: www.plus.google.com/+Dallaswindows
Now maybe it will never be important for you to promote yourself in any way. That is doubtful if you desire to be an expert in your field. Most small business owners have 20+ years in their trade or industry and are experts but the internet has to be able to see that expertise and see it benefit the reader or the web searcher.
This is why I have to get a small business blog that talks about my small home improvement company. And this is why you have to get a Google Plus Business page as soon as possible.
I'm looking forward to sharing on this blog. My years of web development just hit 15 and I've made a great life with a small replacement window company and a great web presence. Let me share it with you and come back to visit us often! ~ Dave And don't miss our other outreaches for the cool pictures! www.Facebook.com/dallaswindows www.plus.google.com/+dallaswindows www.linkedin.com/in/dallaswindows
Subscribe to:
Posts (Atom)